.png)
Making an Electronic Meter Using Distance Sensor with Arduino | HC-SR04
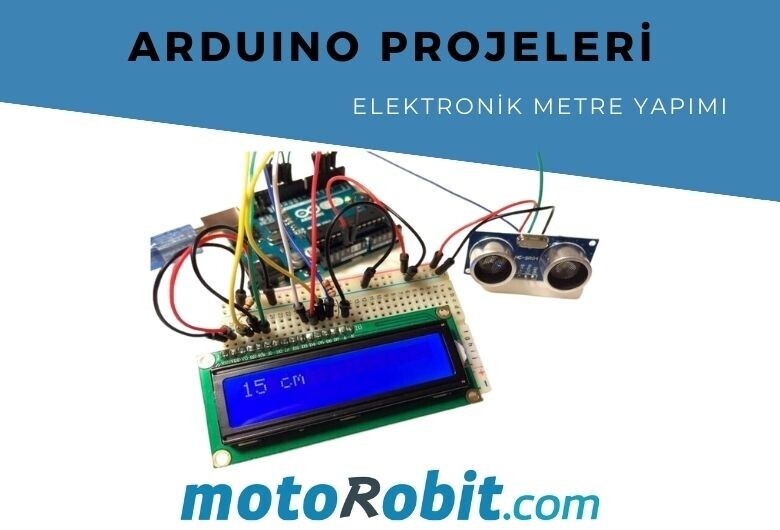
Did you know that you can create your own digital meter using an Arduino and a distance sensor? If you're new to the world of Arduino, this fantastic introductory project is just for you! In this blog post, we'll guide you through the required materials, connection diagram, and Arduino code step by step.
Material List for Arduino Distance Measurement
- Arduino Uno (You can also choose other models like Mega or Nano.)
- HC-SR04 Ultrasonic Sensor
- 2x16 LCD Display
- Jumper Wires
- Breadboard
- 220R 1/4W Resistor (You can use other resistors with close values. It will only affect changing the brightness of the display.)
These are all the required materials. You can click on the product names to go to the purchase pages.
What is HC-SR04?
The HC-SR04 used in our project is an ultrasonic distance sensor. Its working principle involves emitting ultrasonic sound waves and receiving them back. The sensor captures the returning ultrasonic waves and sends the data to the Arduino. The data processed by the Arduino converts the measured values into centimeters, making it meaningful. This is the technical logic behind measuring distance with Arduino.

HC-SR04 performs distance measurement based on a formula we've seen in physics lessons: Distance = Speed X Time. It obtains data by sending a signal and receiving its return. Of course, its range is not infinite. This affordable and practical sensor can measure distances between 2-400cm.
Connection Diagram
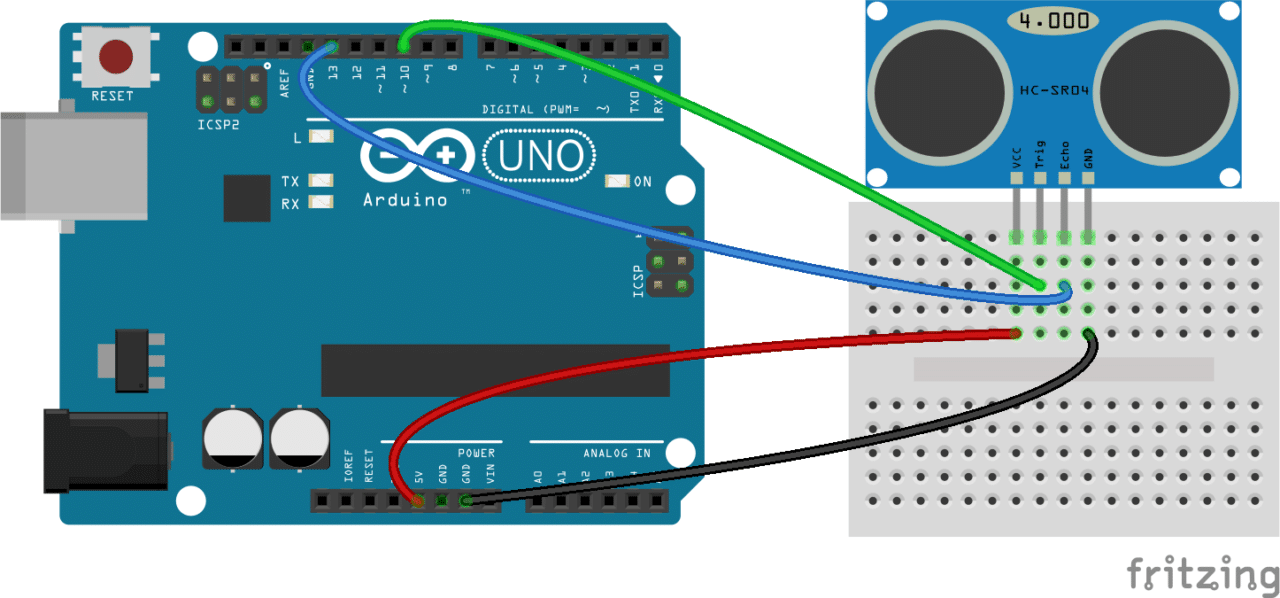
First, we need to connect the Arduino and the sensor in this way. The codes we will provide below are based on this connection. If a different pin connection is made, the project will fail. However, if you make a different connection and adjust the codes accordingly, that's a different story. :)
By using the codes below, you can see the measured distance on the Arduino serial port screen without a display.
#define trigPin 10
#define echoPin 13
void setup() {
Serial.begin (9600);
pinMode(trigPin, OUTPUT);
pinMode(echoPin, INPUT);
}
void loop() {
float duration, distance;
digitalWrite(trigPin, LOW);
delayMicroseconds(2);
digitalWrite(trigPin, HIGH);
delayMicroseconds(10);
digitalWrite(trigPin, LOW);
duration = pulseIn(echoPin, HIGH);
distance = (duration / 2) * 0.0344;
if (distance >= 400 || distance <= 2){
Serial.print("Distance = ");
Serial.println("Out of range");
}
else {
Serial.print("Distance = ");
Serial.print(distance);
Serial.println(" cm");
delay(500);
}
delay(500);
}
Displaying Distance Measurement on LCD with Arduino
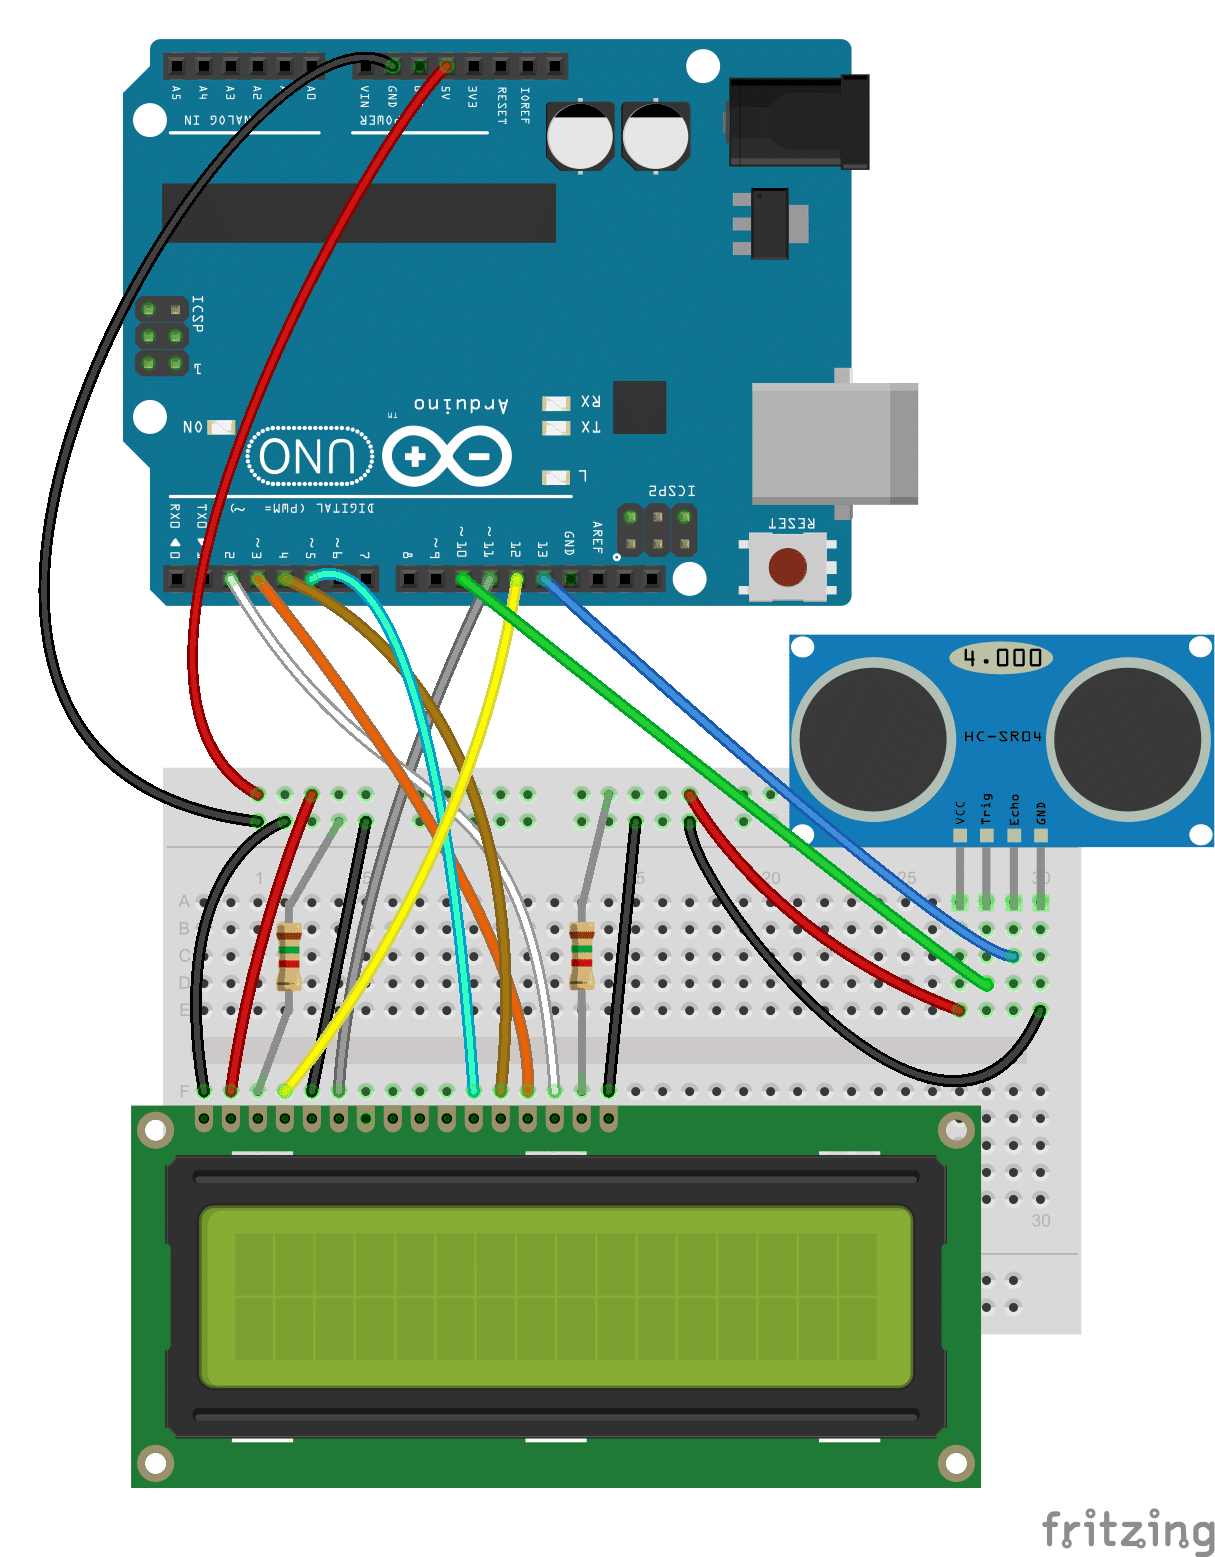
Referring to the connection diagram above, we integrate the display into the system we set up earlier. Then, by using the code below, we can display the measured distance on the screen.
#include <LiquidCrystal.h>
#define trigPin 10
#define echoPin 13
LiquidCrystal lcd(12, 11, 5, 4, 3, 2);
void setup() {
pinMode(trigPin, OUTPUT);
pinMode(echoPin, INPUT);
}
void loop() {
float duration, distance;
digitalWrite(trigPin, LOW);
delayMicroseconds(2);
digitalWrite(trigPin, HIGH);
delayMicroseconds(10);
digitalWrite(trigPin, LOW);
duration = pulseIn(echoPin, HIGH);
distance = (duration / 2) * 0.0344;
if (distance >= 400 || distance <= 2){
lcd.print("Out of range");
delay(500);
}
else {
lcd.print(distance);
lcd.print(" cm");
delay(500);
}
delay(500);
lcd.clear();
}
And that concludes our Arduino distance measurement project. Stay tuned to Motorobit for many similar applications!
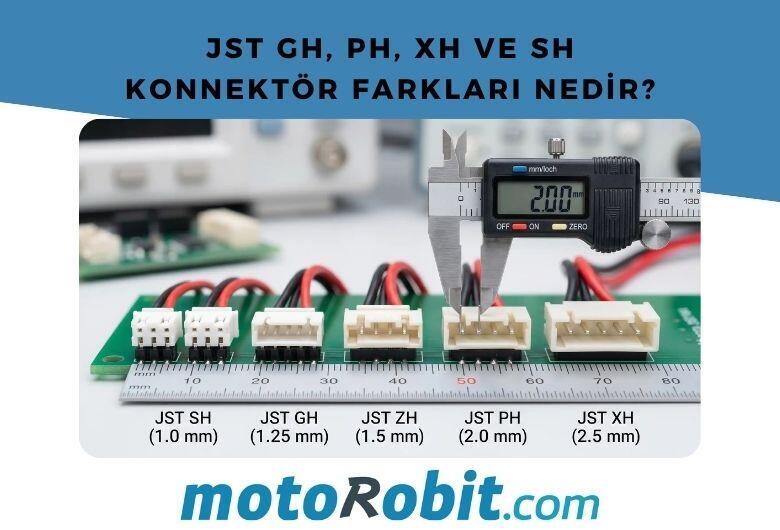
JST GH vs PH vs XH vs SH Connectors: Differences
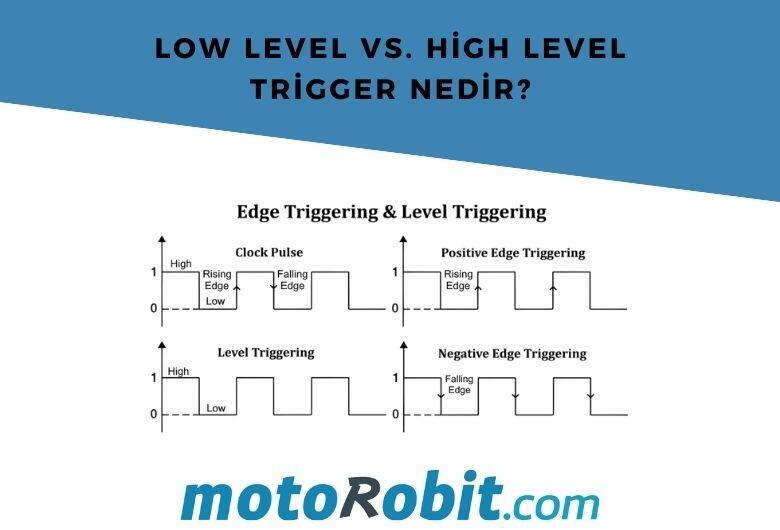
Low Level vs. What is High Level Trigger?

The Code of Numbers on Drone Propellers: How to Read Propeller Measurements?
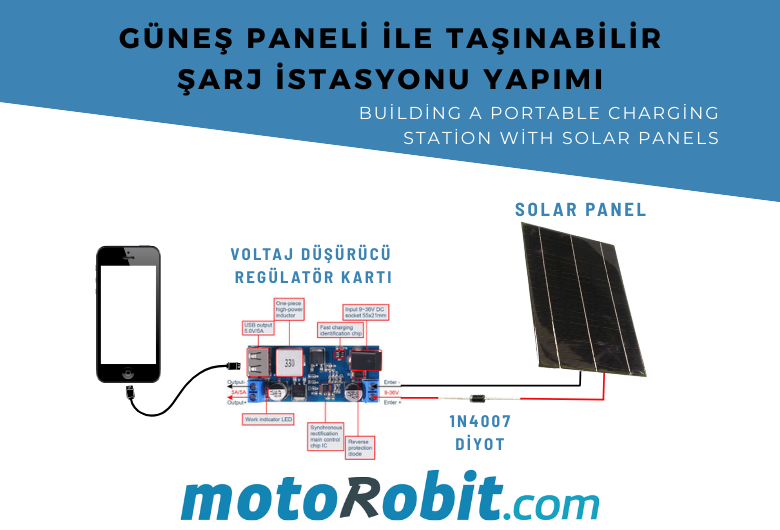
Building a Portable Charging Station with Solar Panels
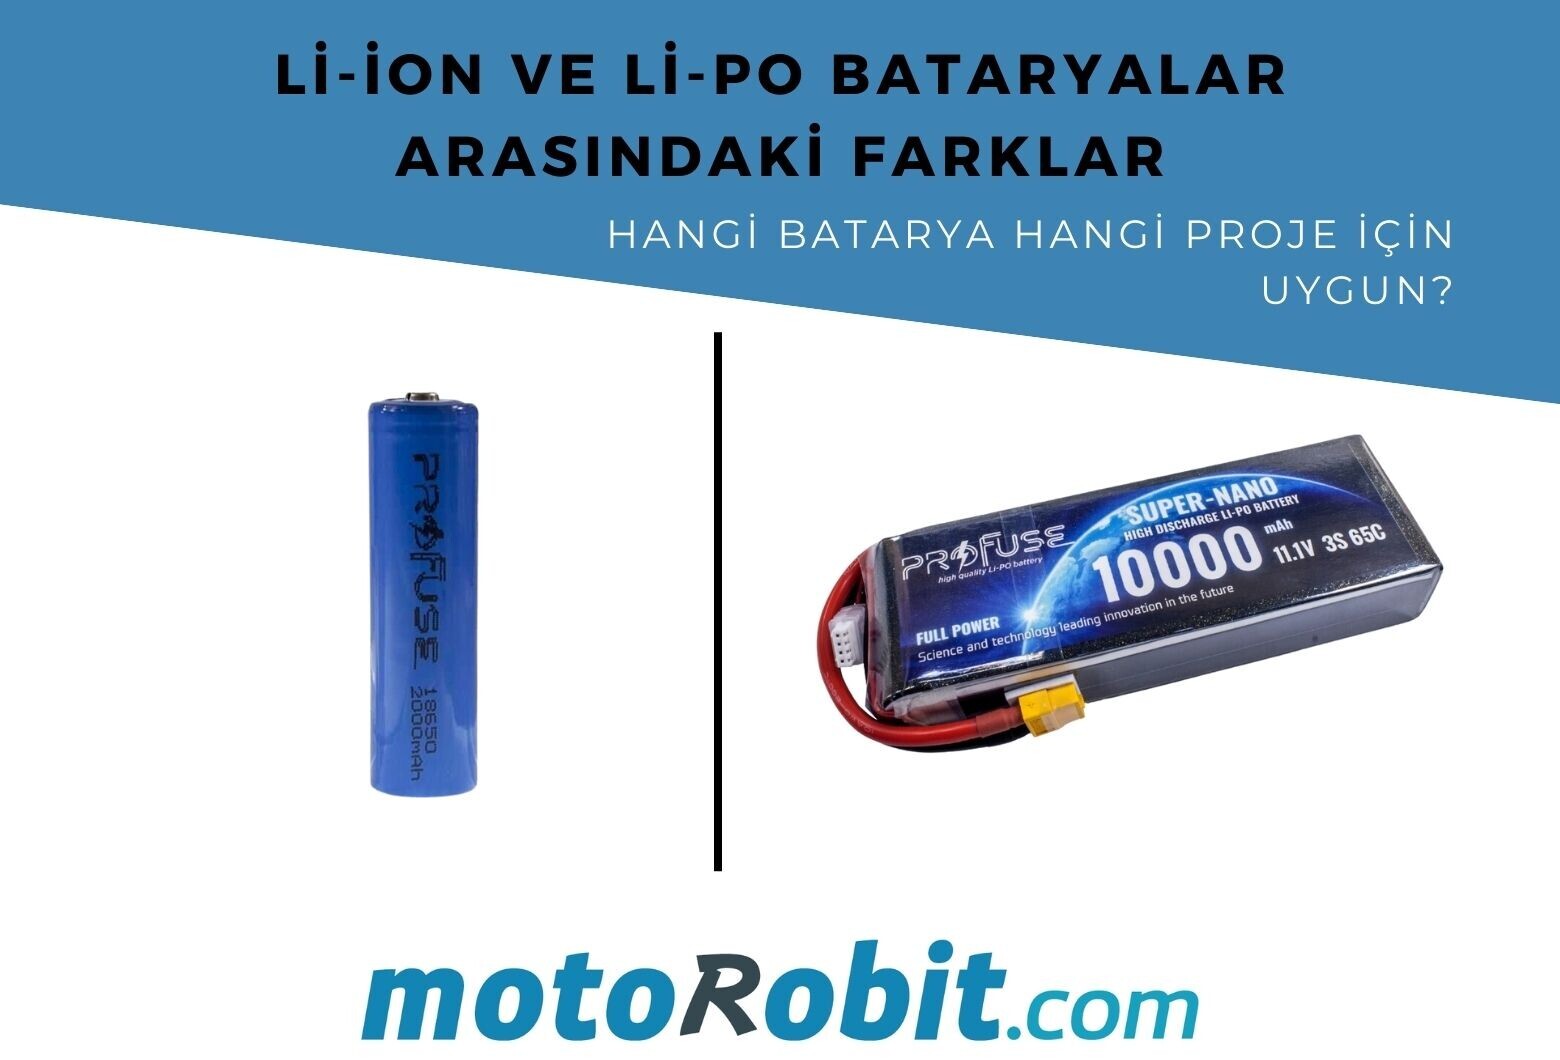
Differences Between Li-ion and Li-Po Batteries: Which Battery is Suitable for Which Project?