.png)
MPU-9250: 9-Axis Acceleration Sensor - A Comprehensive Beginner's Guide

What is the MPU-9250 and Why is it Important?
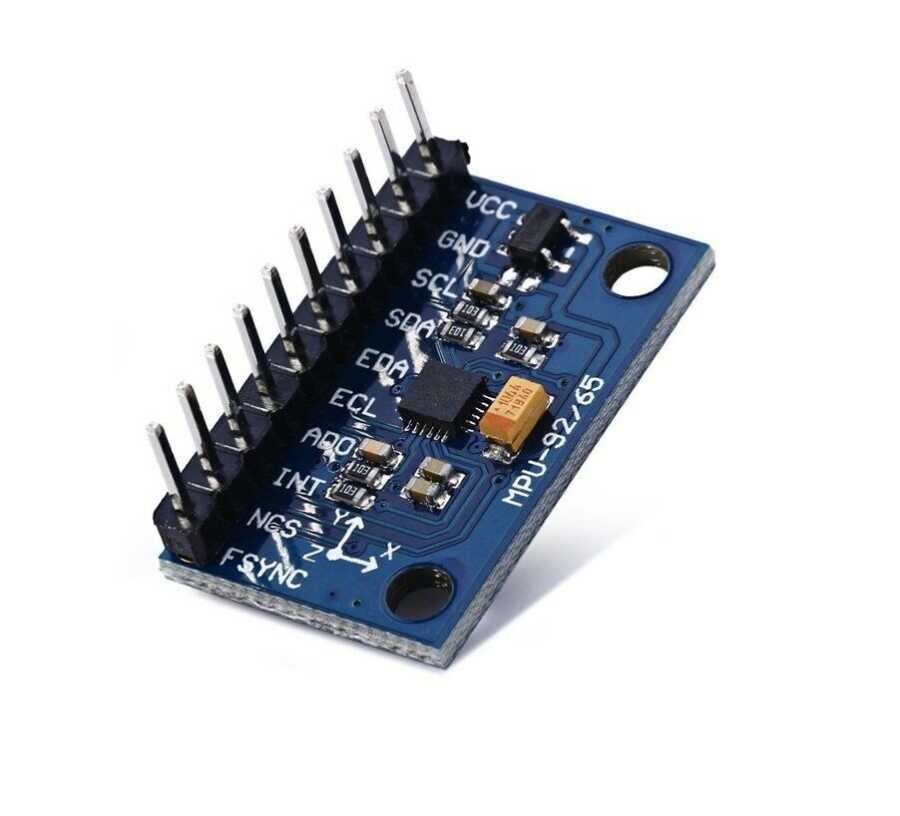
The MPU-9250 is an IMU (Inertial Measurement Unit) module that integrates three different sensors (a 3-axis Accelerometer, 3-axis Gyroscope, and 3-axis Magnetometer) into a single chip. It provides a total of 9-axis data:
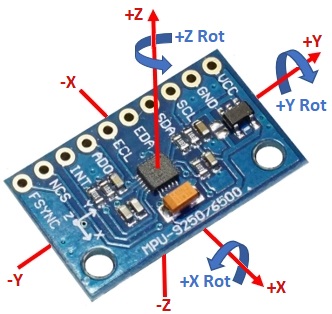
1. Accelerometer (3-Axis): Measures linear acceleration and gravitational force on the X, Y, Z axes. It helps determine which direction the device is moving or the angle at which it is positioned.
Measurement Range:±2g, ±4g, ±8g, ±16g (Selectable)
2. Gyroscope (3-Axis): Measures the angular velocity (rate of rotation) on the X, Y, Z axes. It is critical for determining how fast a drone rotates or how much a robot tilts.
Measurement Range:±250, ±500, ±1000, ±2000 degrees/second (Selectable)
3. Magnetometer (3-Axis): Measures the Earth's magnetic field. This data is used to determine the device’s heading relative to North, just like a digital compass.
Importance: Combining data from these three sensors through an algorithm (such as a Kalman Filter or Madgwick Filter) allows for a much more accurate calculation of the device’s absolute orientation in space (Roll, Pitch, Yaw).
Key Technical Specifications and Connections
Before integrating the module into your project, here’s what you need to know:
| Feature | Value |
| Operating Voltage | 3V - 5V (Most modules include a voltage regulator) |
| Communication Protocol | I2C (commonly used) and SPI |
| Resolution | 16-bit (High precision) |
| Applications | Drones, robots, wearable technology, navigation systems |
Arduino Wiring Diagram (for I2C Protocol):
When connecting the MPU-9250 to an Arduino Uno, you’ll need the following basic pins:
| MPU-9250 Pin | Arduino Uno Pin | Description |
| VCC | 5V or 3.3V | Power Supply |
| GND | GND | Ground |
| SCL | A5 (Analog 5) | I2C Clock Pin |
| SDA | A4 (Analog 4) | I2C Data Pin |
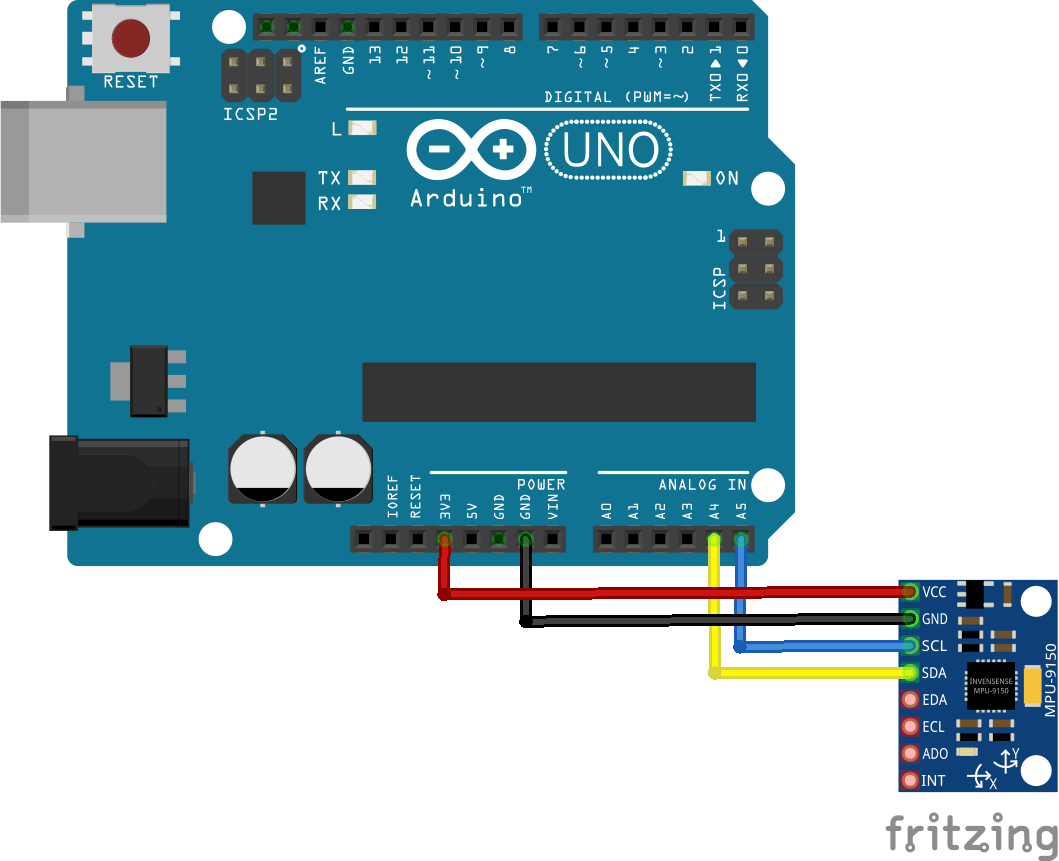
Note: Some modules operate at 3.3V. Check for a voltage regulator on your module. If you use a 5V power supply, make sure the module is 5V-tolerant. Most modules include a built-in regulator and can safely run at 5V.
Programming Steps with Arduino (Quick Start)
Using a library to read data from the MPU-9250 will make your work much easier.
Step 1: Install the Library
Open Arduino IDE and go to Sketch > Include Library > Manage Libraries. In the search bar, type "MPU9250" and install a suitable library (for example, SparkFun or b'no libraries are popular).
Step 2: Load Example Code
After installing the library, open an example from File > Examples — usually named BasicReadings or Example. This example includes all the necessary code to read acceleration, angular velocity, and magnetic field data from the X, Y, Z axes.
Step 3: Observe the Data
Upload the code to your Arduino and open the Serial Monitor. As you move the sensor, you’ll see real-time readings from the three sensors along the X, Y, Z axes.
Gyroscope Data (dps): The values change when the sensor rotates.
Accelerometer Data (g): When the sensor is stationary with the Z axis facing upward, you should see approximately +1.00g or -1.00g on the Z axis.
Magnetometer Data (μT): Bringing a magnet close to the sensor or rotating it will cause these values to change.
Advanced: Orientation Calculation and Calibration
Reading raw data alone is not enough. To understand where your device is in space, you must combine the data:
Sensor Fusion: The gyroscope measures short-term angular rotation accurately but tends to drift over time. The accelerometer and magnetometer provide long-term stable orientation data. Combining them with filters such as Kalman or Madgwick gives stable and accurate Roll, Pitch, and Yaw angles.
Calibration: To ensure accurate magnetometer and accelerometer readings, calibration is essential. The magnetometer is affected by nearby metal objects, so “hard iron” and “soft iron” distortions must be corrected.
Tip: Most libraries include built-in sensor fusion and calibration functions. You can use these during the initial stages of your project for quick results.
Applications
The potential of the MPU-9250 is nearly limitless:
Drones and Multicopters: Essential for flight stability and navigation.
Robotics: Used to control robotic arm movements or mobile robot orientation.
Wearable Technology: Devices that track human body movement.
Virtual and Augmented Reality: Provides precise position and orientation tracking for controllers and headsets.
Now that you understand the power of the MPU-9250 and know the first steps to get started, it’s time to experiment and create something amazing!
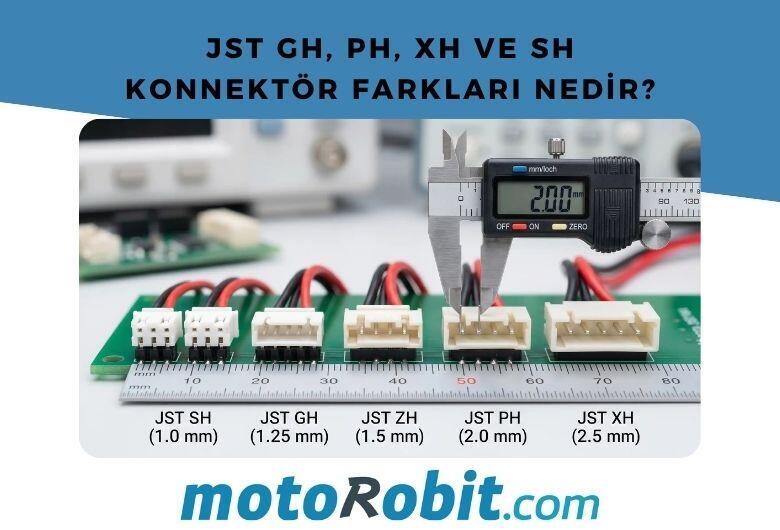
JST GH vs PH vs XH vs SH Connectors: Differences
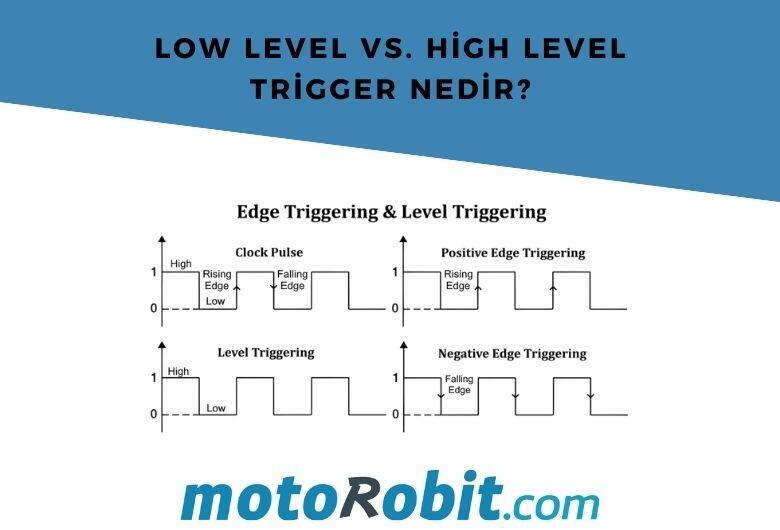
Low Level vs. What is High Level Trigger?

The Code of Numbers on Drone Propellers: How to Read Propeller Measurements?
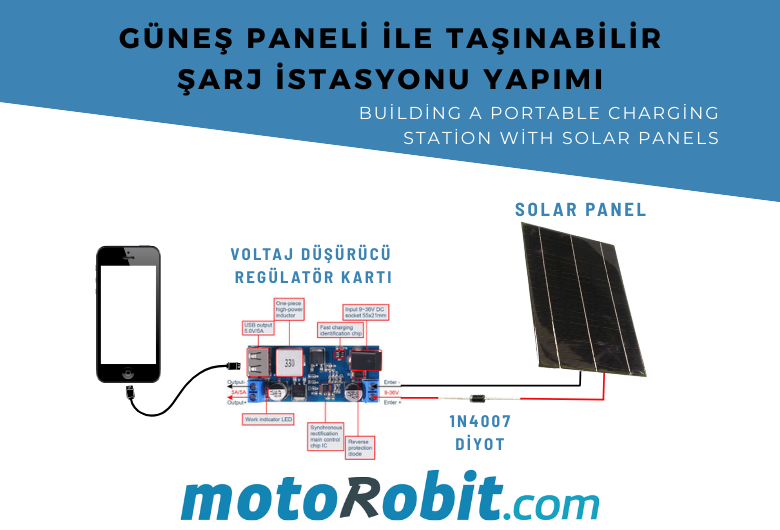
Building a Portable Charging Station with Solar Panels
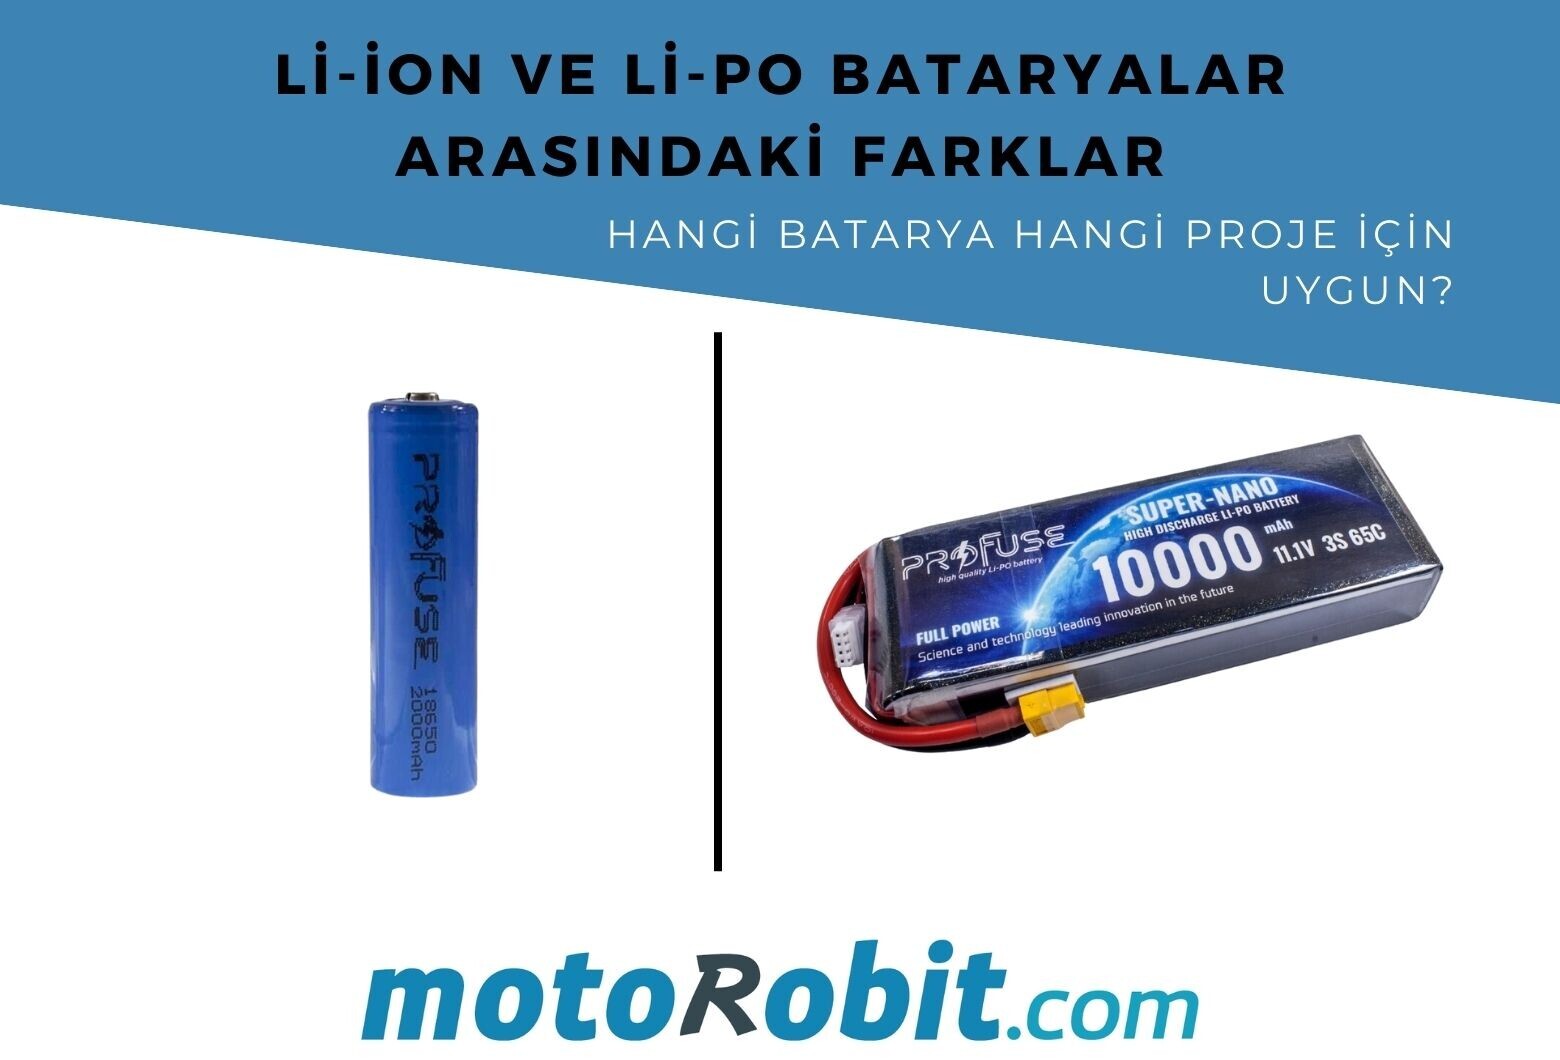
Differences Between Li-ion and Li-Po Batteries: Which Battery is Suitable for Which Project?