.png)


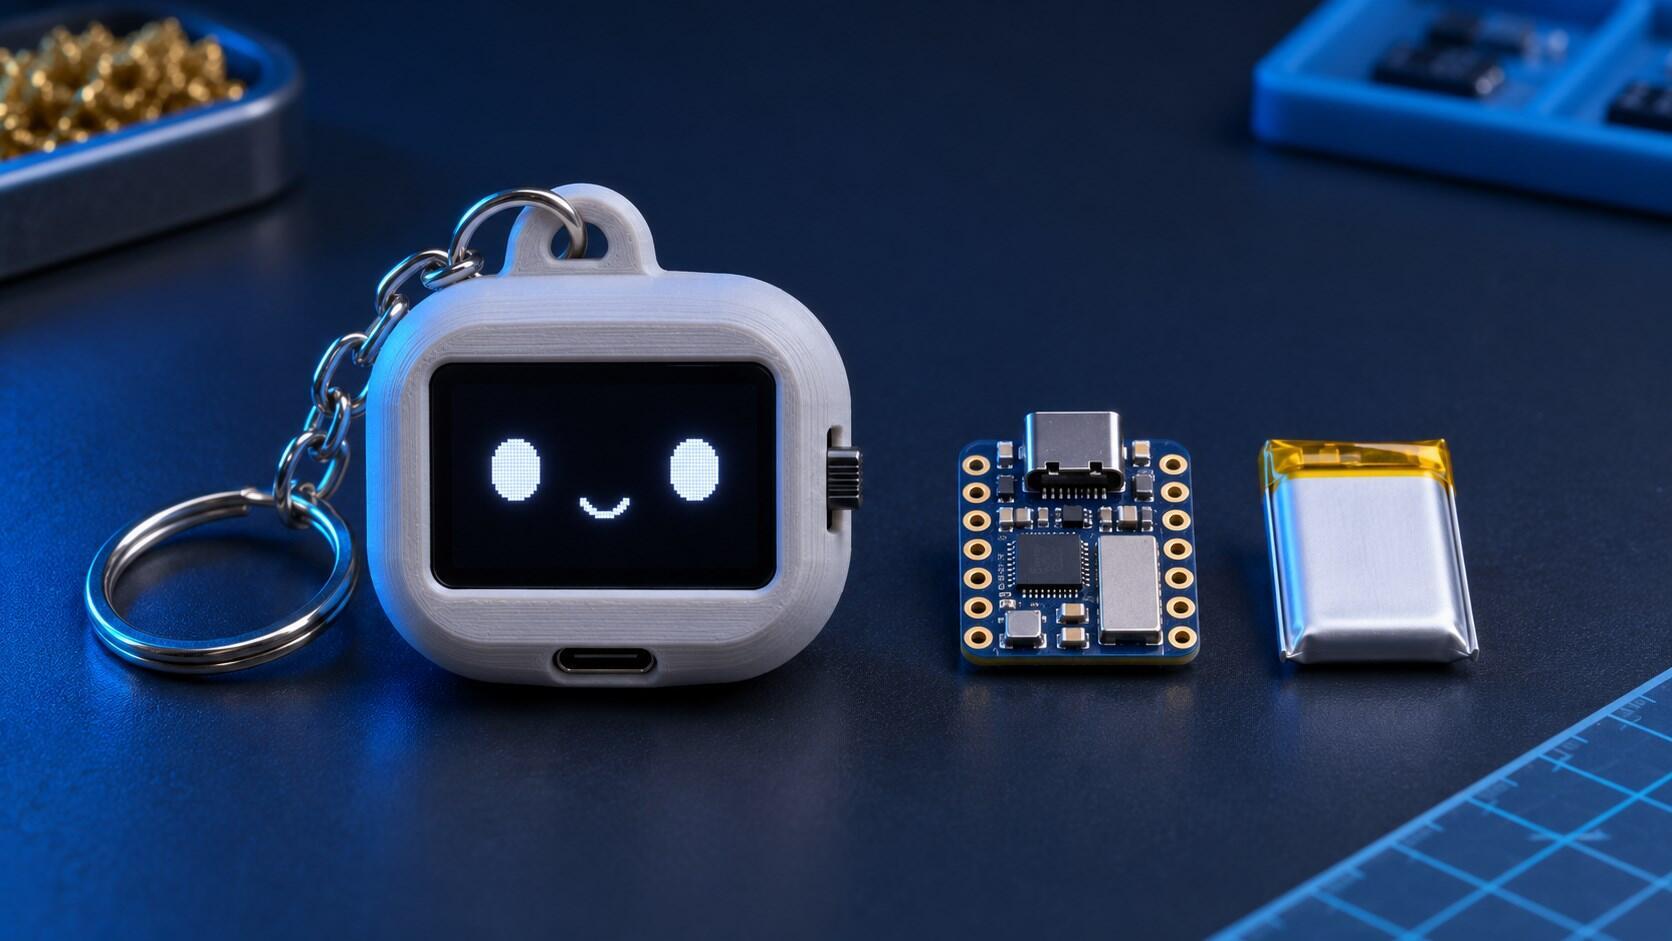
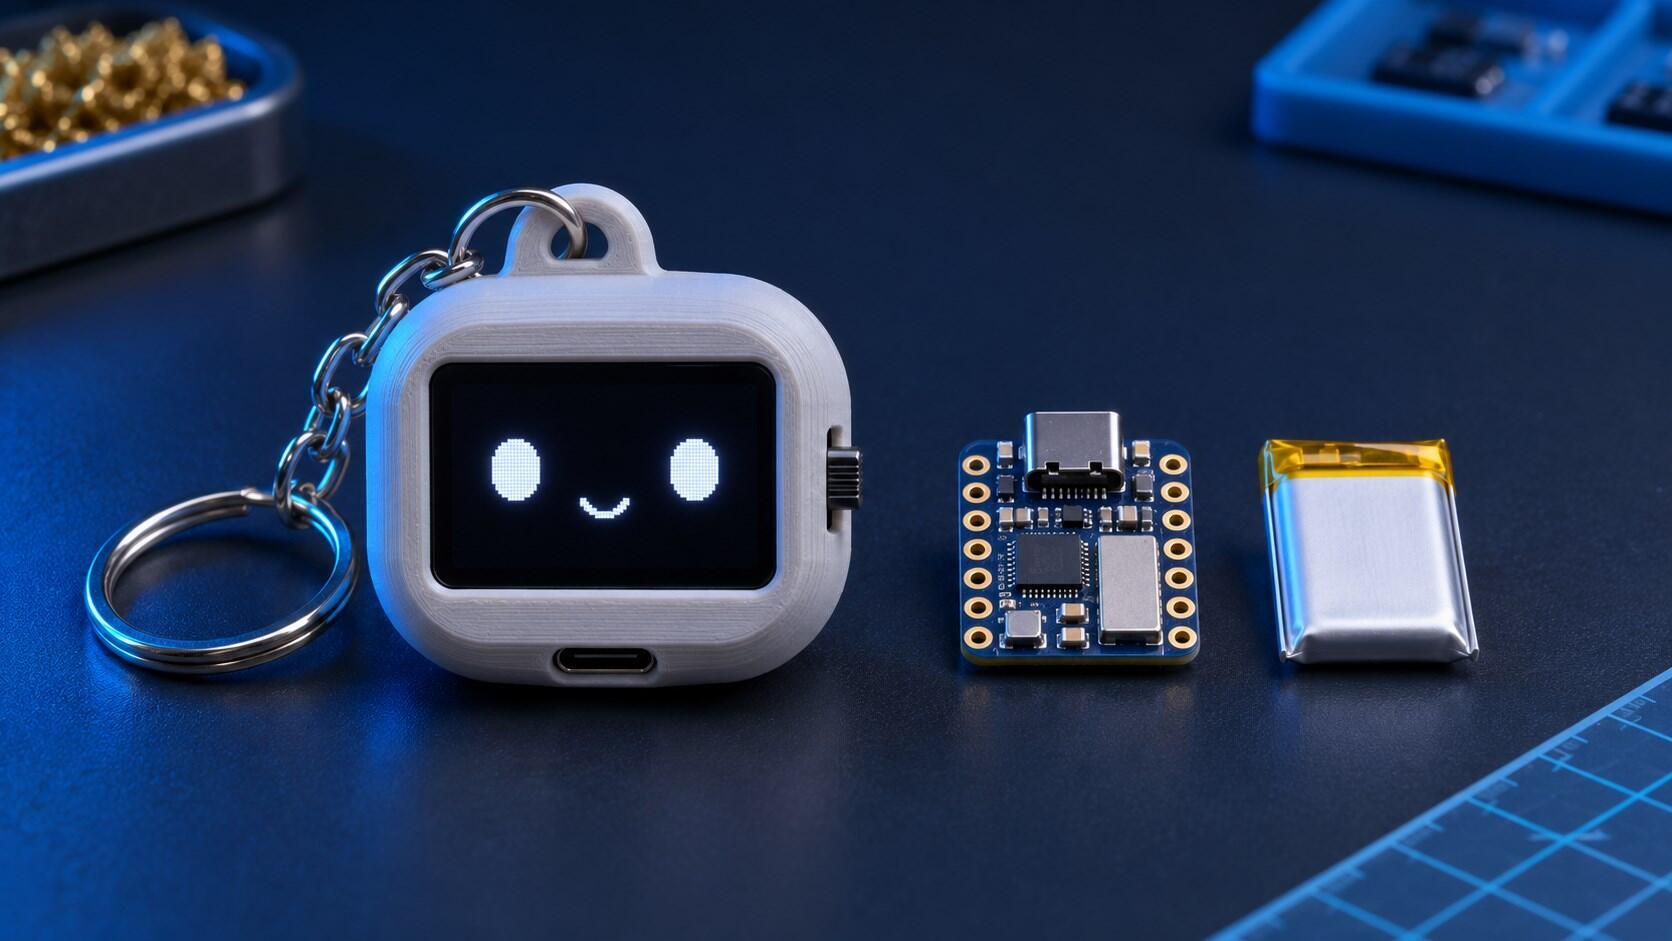
In this guide, we’ll build a cute mini OLED character from scratch—one that changes facial expressions. Even if you’ve never built an electronic circuit before, you’ll see step by step where each wire goes, which program to upload, and how to send the code to the board.
1. Materials you’ll need
- XIAO ESP32-C6 Development Board — The brain of the project.
- 1.3″ 128×64 I2C OLED display — Shows the character’s face.
- 3.7 V 180 mAh LiPo battery — A portable power source.
- 2-position, 3-pin slide switch — The on/off switch.
- Jumper wires, a soldering iron, solder wire, a USB-C data cable, and an optional 3D-printed enclosure.
2. How does the system work?
The XIAO ESP32-C6 calculates the face to be drawn and sends it to the OLED display using a two-wire communication method called I2C. SDA is the data wire; it carries the drawing information. SCL is the clock wire; it determines the rhythm at which the data is sent. VCC and GND are the display’s power/electrical connections.
3. Wiring diagram
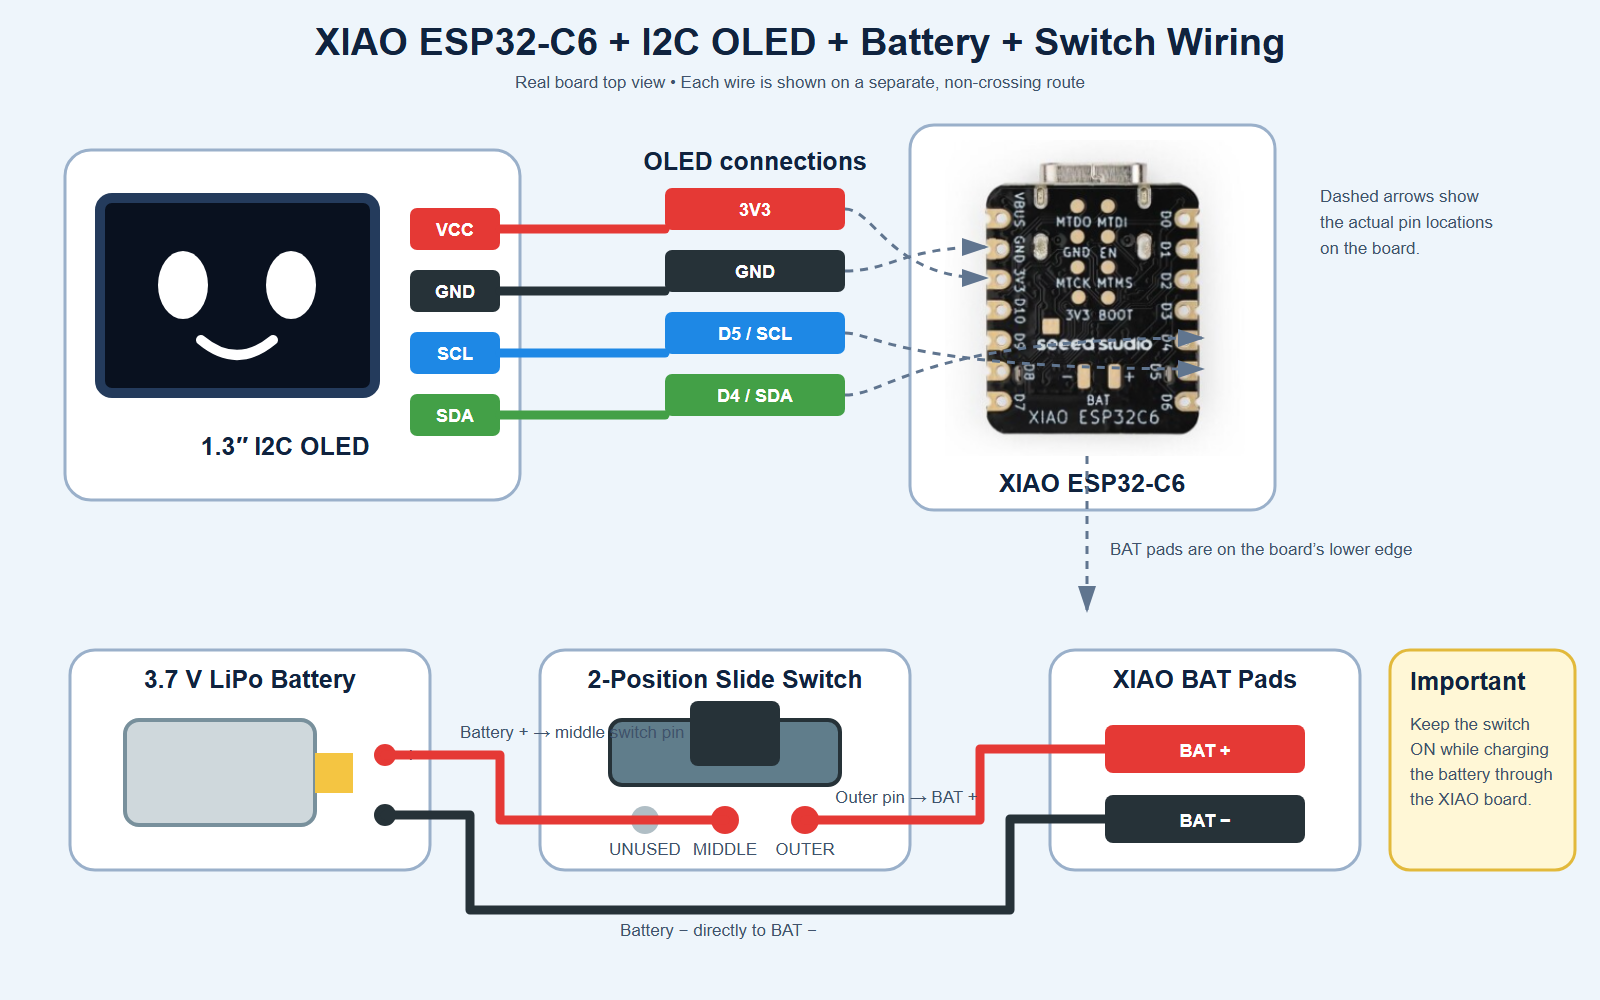
Shows red power, black minus/ground, green data, and blue clock connections.
| Starting point | Goes to | Task |
|---|---|---|
| OLED VCC | XIAO 3V3 | Supplies safe 3.3 V power to the display. |
| OLED GND | XIAO GND | Common minus/ground connection. |
| OLED SDA | XIAO D4 / SDA | Sends data to the display. |
| OLED SCL | XIAO D5 / SCL | Communication clock. |
| Battery plus (+) | Switch middle pin | Brings the battery’s plus line to the switch. |
| Switch outer pin | XIAO BAT+ | Connects to the battery when the switch is turned on. |
| Battery minus (−) | XIAO BAT− | Battery minus line. |
Connecting the 3-pin slide switch
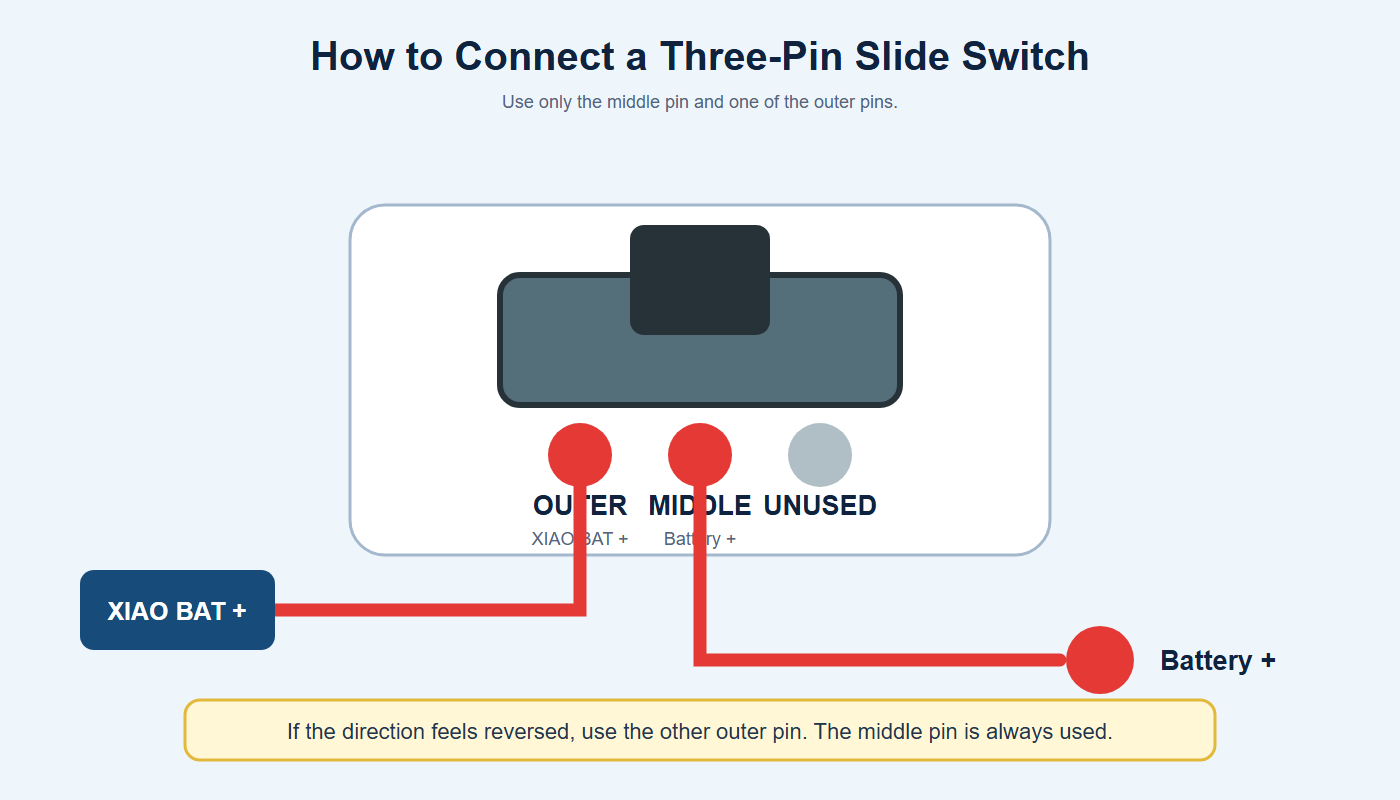
This switch has three pins, but we’ll use only two: the middle pin and one of the outer pins. The other outer pin will remain unused. If the direction of the switch is reversed, swap the outer pin you’re using with the other outer pin.
Soldering order
- Disconnect the USB cable and the battery from the circuit.
- First, prepare the OLED’s VCC, GND, SDA, and SCL wires.
- Solder these four wires to the XIAO according to the table.
- Solder the battery’s plus wire to the switch’s middle pin.
- Connect one of the switch’s outer pins to the BAT+ pad on the XIAO.
- Connect the battery’s minus wire to the XIAO BAT− pad.
- Use heat-shrink tubing or insulation so no metal is exposed.
- After confirming there is no short circuit, connect the battery.
4. The program we’ll use: Arduino IDE
Arduino IDE is a free program that sends the code we write to the XIAO board. From the Arduino IDE download page, download and install the version that matches your operating system.
Installing ESP32 board support
- Open Arduino IDE.
- Go to the File > Preferences menu.
- Add this address to the Additional Boards Manager URLs field:
https://espressif.github.io/arduino-esp32/package_esp32_index.json - Open the Boards Manager section from the left side.
- Search for esp32 and install version 3.0.0 or newer of the Espressif Systems package.
- Select Tools > Board > ESP32 Arduino > XIAO_ESP32C6.
- Connect the board to your computer with a USB-C data cable, then select the visible port from Tools > Port.
Installing the U8g2 display library
- Click the Library Manager icon on the left side of Arduino IDE.
- Type U8g2 in the search box.
- Install the U8g2 library prepared by Oliver Kraus.
5. Let’s do a small screen test first
Before moving on to the full animation code, checking that the display and wires work makes things easier. In Arduino IDE, select File > New Sketch, delete the incoming code, and paste the code below:
#include <Wire.h>
#include <U8g2lib.h>

// For the Motorobit display, we first try the SH1106 driver.
U8G2_SH1106_128X64_NONAME_F_HW_I2C display(U8G2_R0, U8X8_PIN_NONE);

void setup() {
  Wire.begin(D4, D5);       // D4 = SDA, D5 = SCL
  display.begin();
  display.clearBuffer();
  display.setFont(u8g2_font_ncenB14_tr);
  display.drawStr(16, 38, "Hello!");
  display.sendBuffer();
}

void loop() {
  // We don’t do anything here because the text stays on the screen.
}
Check the code by pressing the checkmark in the top-left corner, then press the Upload button shaped like a right arrow. If you see “Hello!” on the screen, the connections are correct.
U8G2_SH1106_128X64_NONAME_F_HW_I2C in the test code to U8G2_SSD1306_128X64_NONAME_F_HW_I2C and upload again.6. Full animation code
The code below automatically finds the display’s 0x3C and 0x3D addresses; it draws the character, makes it blink, lets it look left and right, and shows different emotions.
#include <Wire.h>
#include <U8g2lib.h>

// If your display is SH1106, use this line.
U8G2_SH1106_128X64_NONAME_F_HW_I2C display(U8G2_R0, U8X8_PIN_NONE);

// If you don’t get an image with SH1106, comment out the line above and enable this one:
// U8G2_SSD1306_128X64_NONAME_F_HW_I2C display(U8G2_R0, U8X8_PIN_NONE);

enum Emotion {
  NORMAL,
  HAPPY,
  SAD,
  SURPRISED,
  SLEEPY,
  ANGRY
};

Emotion emotion = NORMAL;
int lookX = 0;
int targetLookX = 0;
bool eyesClosed = false;

unsigned long nextBlink = 0;
unsigned long eyesOpenTime = 0;
unsigned long nextMove = 0;

// Searches for the 0x3C or 0x3D address on the I2C bus.
byte findOledAddress() {
  byte possibleAddresses[] = {0x3C, 0x3D};

  for (byte i = 0; i < 2; i++) {
    Wire.beginTransmission(possibleAddresses[i]);
    if (Wire.endTransmission() == 0) {
      return possibleAddresses[i];
    }
  }
  return 0;
}

void drawEyes(int centerX, int centerY, bool leftEye) {
  if (eyesClosed || emotion == SLEEPY) {
    display.drawLine(centerX - 9, centerY, centerX + 9, centerY);
    display.drawLine(centerX - 7, centerY + 1, centerX + 7, centerY + 1);
    return;
  }

  int width = 18;
  int height = 25;

  if (emotion == SURPRISED) {
    width = 22;
    height = 30;
  }

  int x = centerX - width / 2 + lookX;
  int y = centerY - height / 2;
  display.drawRBox(x, y, width, height, 6);

  // For an angry face, draw a slanted black line over the eyes.
  if (emotion == ANGRY) {
    display.setDrawColor(0);
    if (leftEye) display.drawTriangle(x - 2, y - 1, x + width + 2, y - 1, x + width + 2, y + 8);
    else          display.drawTriangle(x - 2, y - 1, x + width + 2, y - 1, x - 2, y + 8);
    display.setDrawColor(1);
  }
}

void drawMouth() {
  switch (emotion) {
    case HAPPY:
      display.drawLine(51, 46, 58, 52);
      display.drawLine(58, 52, 64, 54);
      display.drawLine(64, 54, 70, 52);
      display.drawLine(70, 52, 77, 46);
      break;

    case SAD:
      display.drawLine(51, 55, 58, 49);
      display.drawLine(58, 49, 64, 47);
      display.drawLine(64, 47, 70, 49);
      display.drawLine(70, 49, 77, 55);
      break;

    case SURPRISED:
      display.drawCircle(64, 51, 7);
      break;

    case SLEEPY:
      display.drawLine(58, 52, 70, 52);
      break;

    case ANGRY:
      display.drawLine(54, 55, 64, 50);
      display.drawLine(64, 50, 74, 55);
      break;

    default:
      display.drawLine(58, 52, 70, 52);
      break;
  }
}

void drawFace() {
  display.clearBuffer();
  drawEyes(38, 29, true);
  drawEyes(90, 29, false);
  drawMouth();
  display.sendBuffer();
}

void setup() {
  Serial.begin(115200);
  delay(300);

  Wire.begin(D4, D5);  // XIAO ESP32-C6: D4 SDA, D5 SCL
  byte address = findOledAddress();

  if (address == 0) {
    Serial.println("OLED not found. Check the cables.");
    while (true) delay(1000);
  }

  // Since the U8g2 address is requested in an 8-bit format, we shift it left by 1 bit.
  display.setI2CAddress(address << 1);
  display.begin();

  randomSeed(micros());
  nextBlink = millis() + random(2000, 6000);
  nextMove = millis() + random(1500, 4000);

  Serial.print("OLED found. Address: 0x");
  Serial.println(address, HEX);
}

void loop() {
  unsigned long now = millis();

  // Start blinking.
  if (!eyesClosed && now >= nextBlink) {
    eyesClosed = true;
    eyesOpenTime = now + 150;
  }

  // Re-open the eyes after 150 milliseconds.
  if (eyesClosed && now >= eyesOpenTime) {
    eyesClosed = false;
    nextBlink = now + random(2000, 6000);
  }

  // Choose a new look or emotion at certain intervals.
  if (now >= nextMove) {
    if (random(100) < 40) {
      targetLookX = random(-5, 6);
    } else {
      emotion = (Emotion)random(0, 6);
      targetLookX = 0;
    }
    nextMove = now + random(1500, 4000);
  }

  // Slowly approach the target so the look doesn’t jump instantly.
  if (lookX < targetLookX) lookX++;
  if (lookX > targetLookX) lookX--;

  drawFace();
  delay(33);  // About 30 frames per second
}
7. Easy explanation of the code
| Code section | What does it do? |
|---|---|
#include lines | Enables I2C communication with Wire and OLED drawing with U8g2. |
enum Emotion | List of facial expressions the character can show. |
findOledAddress() | Automatically detects whether the screen is 0x3C or 0x3D. |
drawEyes() | Draws the eyes’ position, size, and whether they’re closed. |
drawMouth() | Draws a different mouth shape depending on the selected emotion. |
setup() | Runs only once when the board powers on; prepares the display. |
loop() | Keeps running while the board is on; manages blinking and emotion changes. |
delay(33) | Keeps the animation smooth by drawing about 30 frames per second. |
8. Uploading the code to the board
- In Arduino IDE, open a new sketch and paste the full code.
- In Tools > Board, make sure XIAO_ESP32C6 is selected.
- Select the board’s port from Tools > Port.
- Compile the code with the checkmark.
- Upload the code to the board using the right-arrow button.
- When the upload is complete, the screen will come to life within a few seconds.
If you don’t see the board, your USB-C cable might be charging-only. Try another USB data cable. If uploading doesn’t start, press the BOOT button on the XIAO, then press the RESET button once, release BOOT, and upload again.
9. Troubleshooting
| Problem | Check |
|---|---|
| The screen is completely off | Check that VCC is connected to 3V3 and GND is connected to GND. |
| The screen is on but there’s no image | Check the SDA/D4 and SCL/D5 wires; try the SSD1306 line instead of SH1106. |
| “OLED not found” message | Open the Serial Monitor in Arduino IDE with 115200 baud; look for broken solder joints or a short circuit. |
| Code doesn’t compile | Make sure the U8g2 library and the latest ESP32 board package are installed. |
| Board not listed in ports | Try another USB data cable or a different USB port. |
| Doesn’t work on battery | Check that the middle pin and one outer pin of the switch are used, and verify the BAT+ and BAT− polarity. |
| Battery isn’t charging | With the USB-C connected, set the switch to the ON position. |
| The board keeps rebooting | Check that the battery isn’t empty and that the solder joints aren’t touching each other. |
10. If you’ll use a 3D-printed enclosure
The 3D model files for the project we took inspiration from are on GitHub. But before you print directly, measure the parts. In this project, the OLED board is about 35.5 × 33.5 mm, the battery is about 24 × 15.5 × 6.7 mm, and the selected switch body is about 10.5 × 5.5 mm. You may need to scale the model up because the original enclosure’s switch opening could be smaller.
Conclusion
Now you have a portable mini character powered by the XIAO ESP32-C6, an I2C OLED display, a small LiPo battery, and a slide switch. First do a simple “Hello!” test, then switch to the full animation code—this makes it easier to spot any connection issues.
Source video for the project: Building a Tiny OLED Keychain
Sample source code: TechTalkies / 123_Keychain
Official XIAO ESP32-C6 getting started guide: Seeed Studio Wiki